


This process spanned a couple of weeks to understanding the concepts involved and running into many pitfalls. The Protocol Labs Team has documentation. However, Estuary is a new technology that's still in Alpha. So, there are a few issues you can Google. Most of the answers come from trying different options and reaching out to the #ecosystem-dev team on Slack.
This post serves as a guide and resource for anyone who is interested in the technology or wants to use it for a project or product. I found myself referencing the commands and processes a few times.
Prerequisites:
- Understanding of Bash Scripting
- Knowledge of APIs
- Familiarity with Filecoin: Deals, CID, and Storage
Getting Started
Estuary is open-source software that allows sending of public data to the Filecoin network that can be retrieved from anywhere. It's an end-to-end example that enables the use of Protocol Labs products such as IPFS, Filecoin, and other technologies together.
Navigate to github.com/application-research/estuary. Now clone the repository in your directory of choice.
git clone https://github.com/application-research/estuary.git
I used a fork. This personal choice gives me more control over my environment and while maintaining changes from the main repository, if necessary.
Navigate to Estuary using the command below:
cd estuary
Installation:
These are the technologies needed to run the node:
- go (1.15 or higher)
- jq
- hwloc
- opencl
It's helpful to use homebrew to make the installation process smoother. The commands are below:
brew install go
brew install jq
brew install hwloc
brew install opencl-headers
Starting the Process
Estuary is built using Go or Golang. Makefiles create a more efficient process for starting large programs. Here's a sneak peek at the Makefile contained in the Estuary directory.
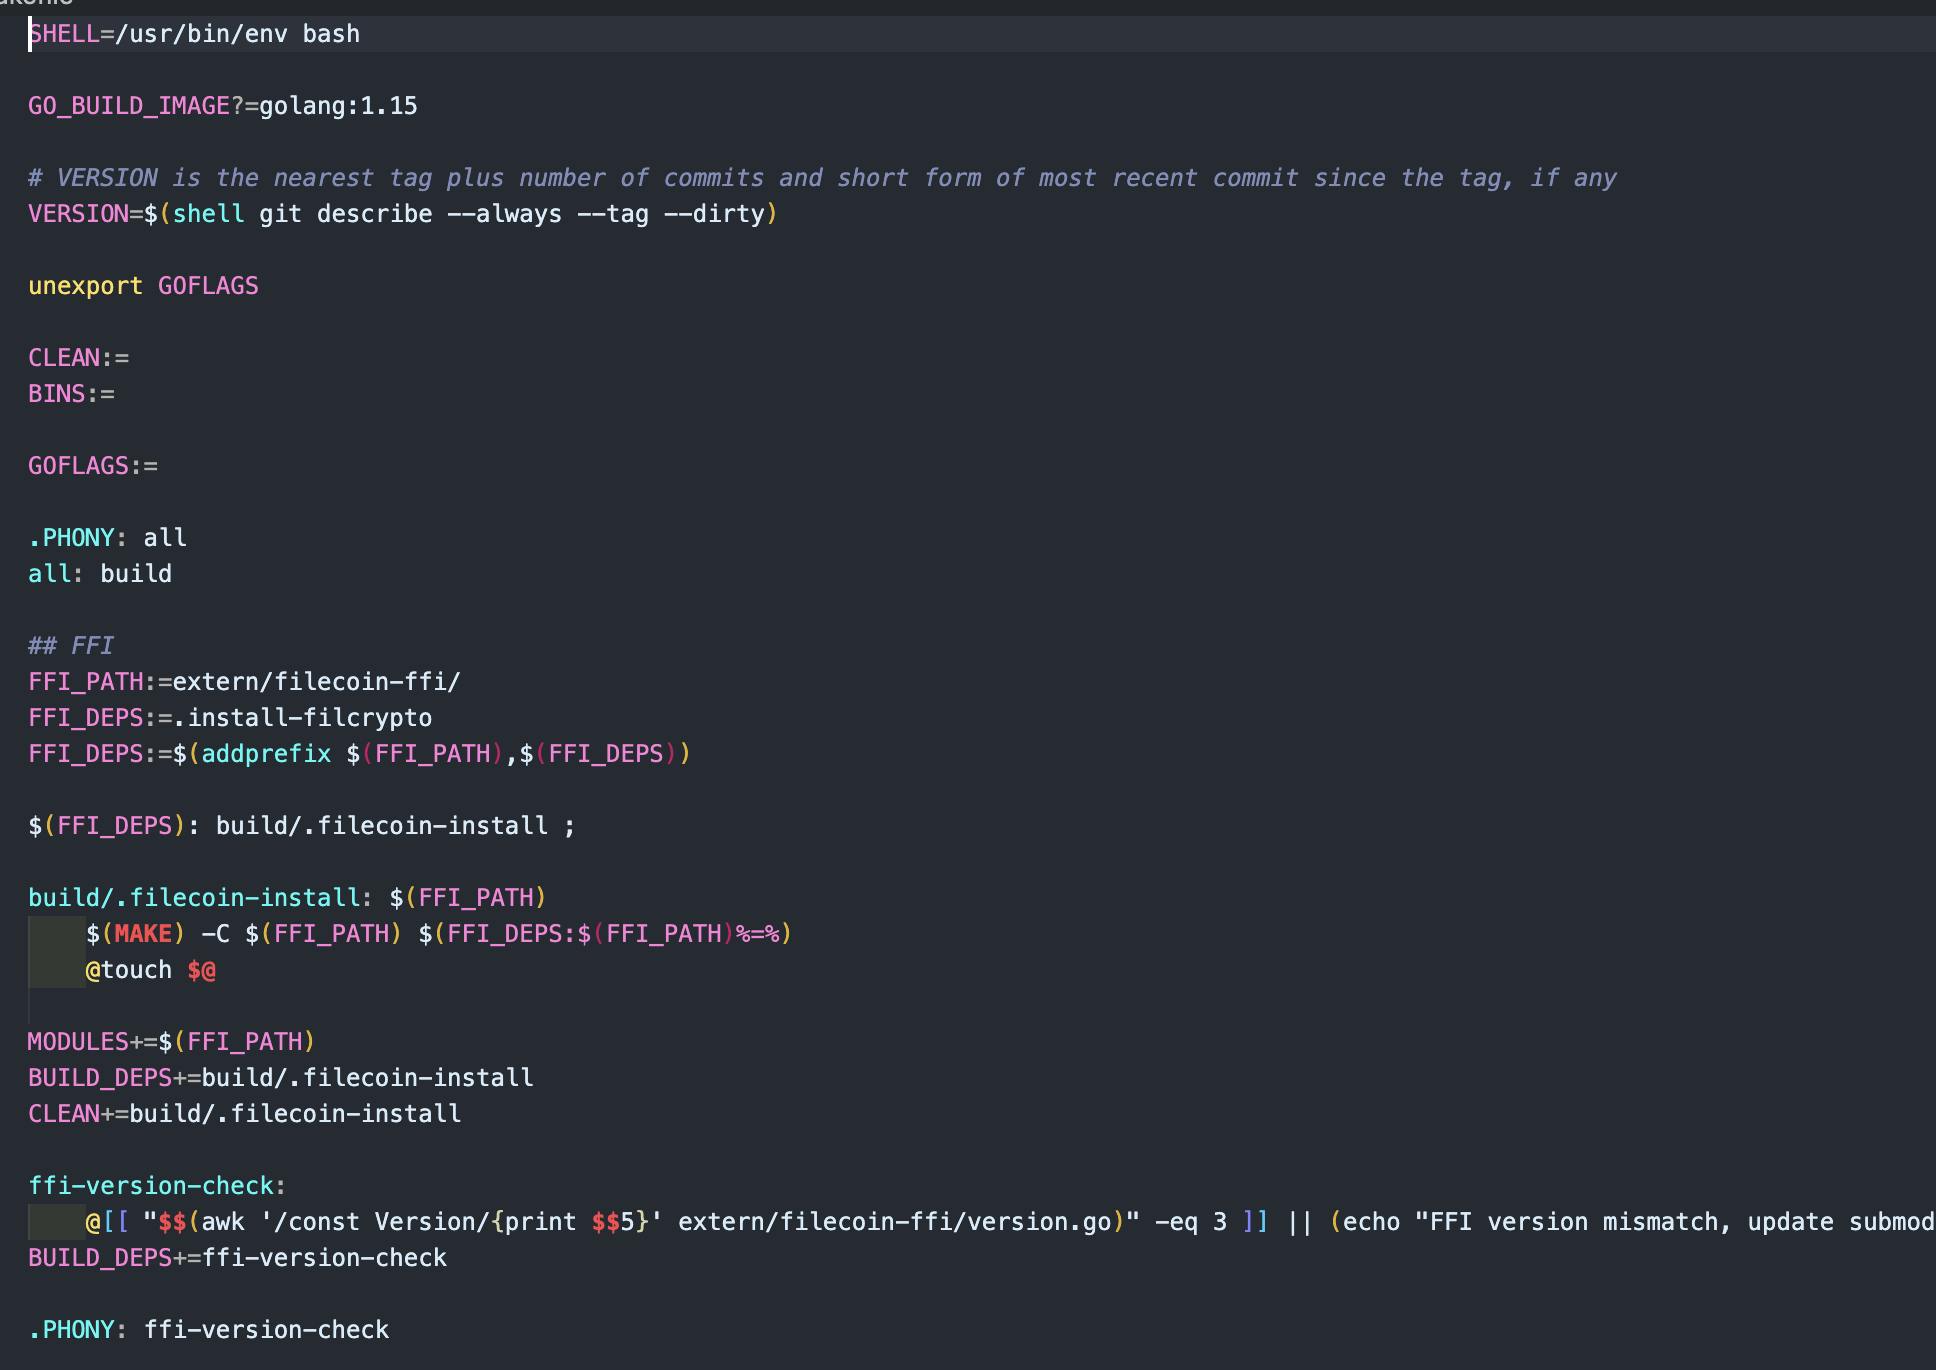
You can find the complete file here: github.com/application-research/estuary/blo..
To get started run the command below. This will prepare your environment to run the Estuary executable file.
make clean all
Optional:
make
Authenticate
Create the necessary user information to access the node that will be associated with your file(s).
Run this command:
./estuary setup --username=<yourusername> --password=<yourpassword>
Make sure you remove the <> when you enter your information.
Keep your authentication token and wallet address from this output.
The Node is Running! 🎉
Your output should be similar to the image below to let you know that your node is running.

Quick Test
Make sure your node is running correctly. Input the same username and password on the sign-in form for estuary.tech. Click on a few pages. Then, check the terminal. You should see a change and the pages you navigated to on your browser reflected on the CLI.
Lotus Gateway
Estuary uses the Lotus Gateway. Lotus is a command-line application that lets you interact with Filecoin. You can do this by uploading and downloading files, renting out your storage to other users, and checking that computers are storing data correctly.
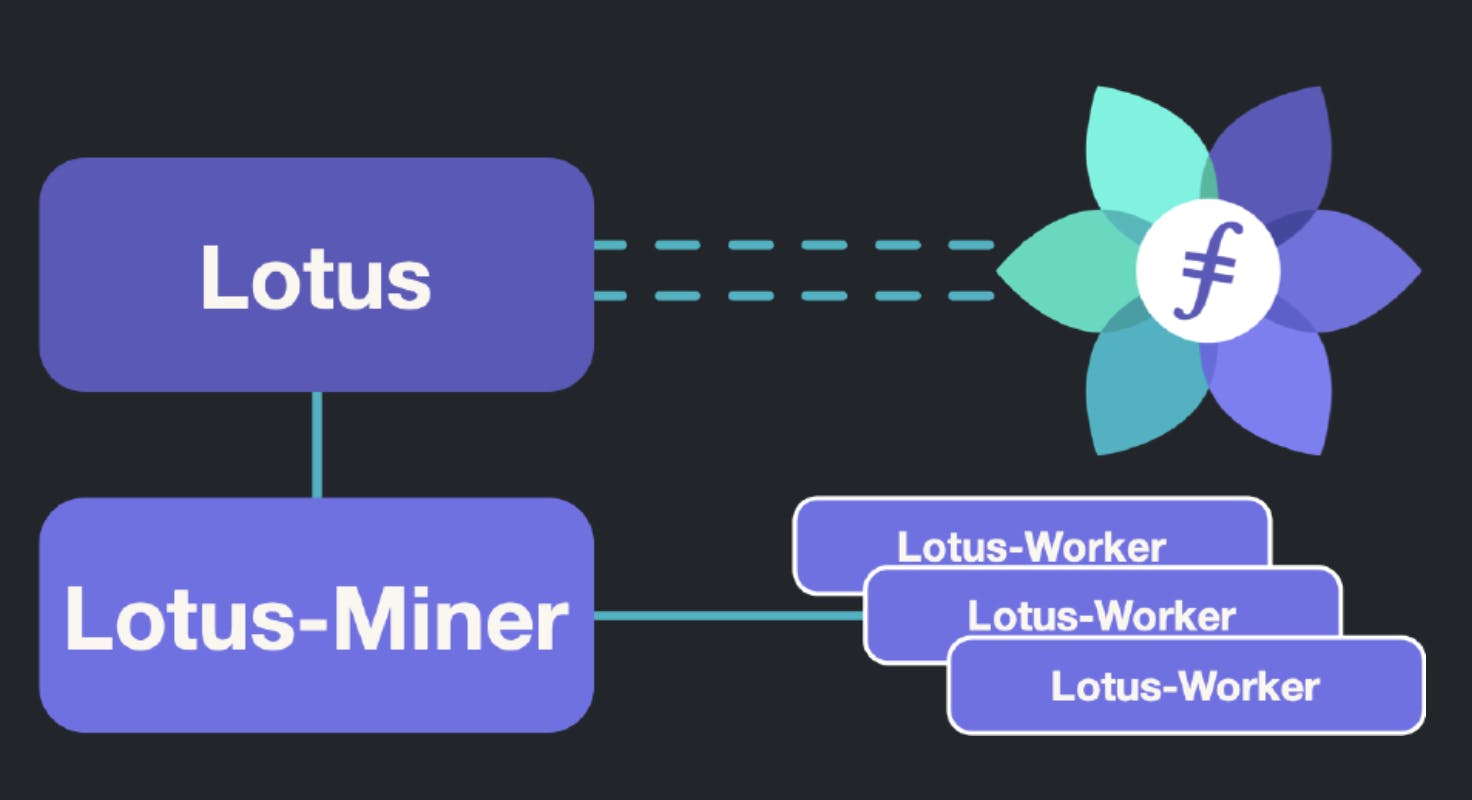
You can find more information about Lotus here: lotus.filecoin.io/lotus/get-started/what-is..
You need to tell Estuary where it can access the Lotus gateway API. Enter the command below:
export FULLNODE_API_INFO=wss://api.chain.love
Point Estuary to the File Directory
This can be an area where you already have existing files or plan to place your file on your local environment.
./estuary --datadir=</path/to/storage> --logging --verified-deal=false
My path looked like this:
./estuary --datadir=/Users/myname/filecoin/estuary_files --logging --verified-deal=false
If you want to use a new database this is the time to make that change:
./estuary --datadir=/path/to/storage --database=<path/to/db> --logging
Note:
Estuary makes verified deals by default and this requires the wallet address to have datacap(see verify.glif.io). To make deals without datacap, it will require the wallet to have FIL, and the run command will need the --verified-deal option set to false. using this modifier --verified-deal=false
Prepare your file to Upload
- Choose a file
- Place your file in your selected directory that was established when setting up your node.
The maximum size per upload is 32 GB. Any file under 3.57 GiB will be batched and placed in the staging area for efficiency.
Run the command below to point Estuary to the directory containing your file:
./estuary --datadir=</path/to/storage> --logging --verified-deal=false
Upload your file to Estuary 🚀
- Find your API Key
- Copy the file path including the file you want to upload.
- Use the command below:
curl -X POST http://localhost:3004/content/add -H "Authorization: Bearer Your_API_Key" -H "Accept: application/json" -H "Content-Type: multipart/form-data" -F "data=@</path/to/storage/file>"
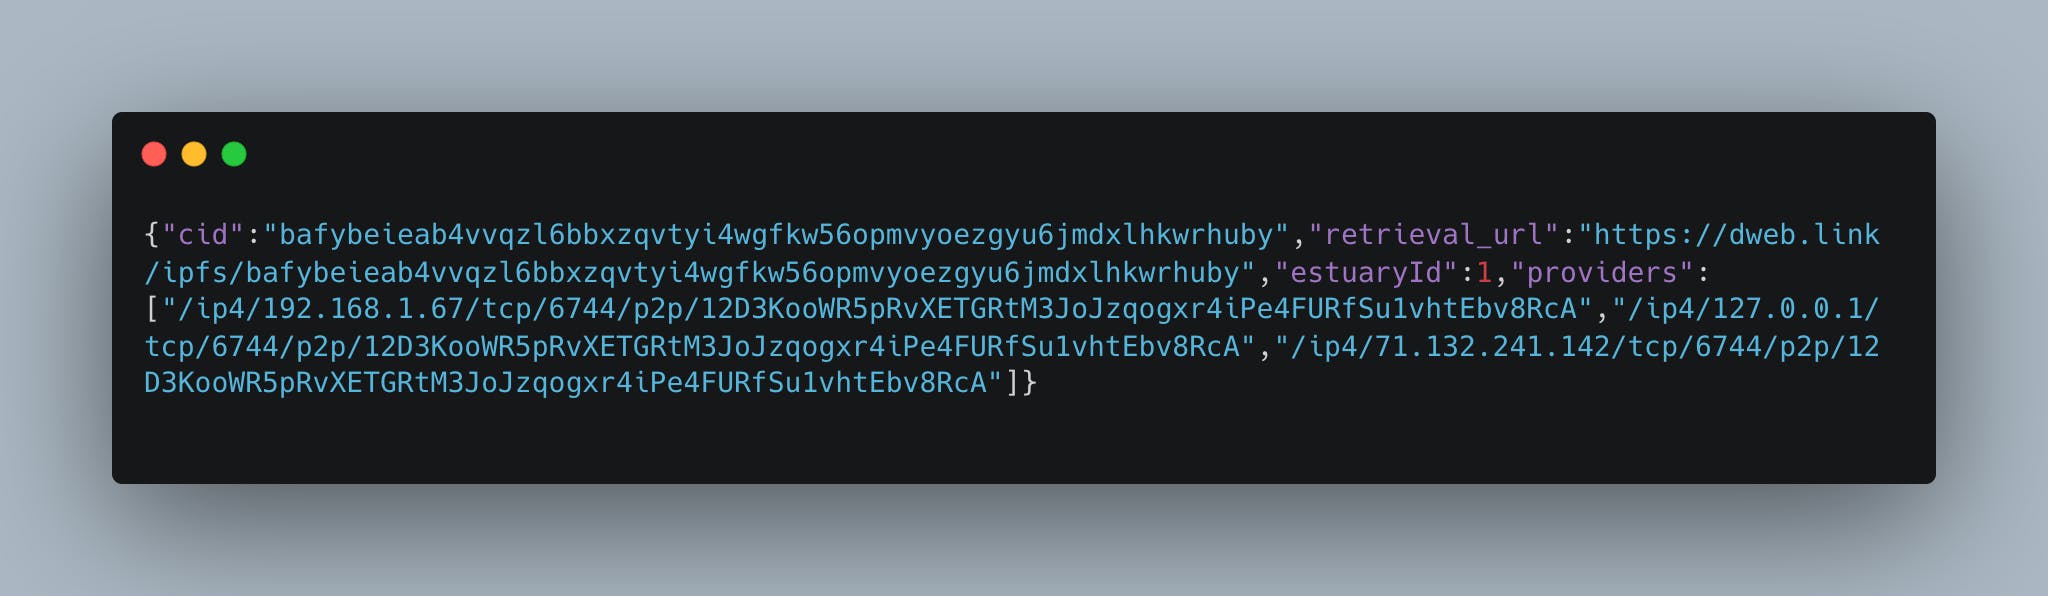
Here is an example of the output:
{"cid":"bafybeieab4vvqzl6bbxzqvtyi4wgfkw56opmvyoezgyu6jmdxlhkwrhuby","retrieval_url":"https://dweb.link/ipfs/bafybeieab4vvqzl6bbxzqvtyi4wgfkw56opmvyoezgyu6jmdxlhkwrhuby","estuaryId":1,"providers":["/ip4/192.168.1.67/tcp/6744/p2p/12D3KooWR5pRvXETGRtM3JoJzqogxr4iPe4FURfSu1vhtEbv8RcA","/ip4/127.0.0.1/tcp/6744/p2p/12D3KooWR5pRvXETGRtM3JoJzqogxr4iPe4FURfSu1vhtEbv8RcA","/ip4/71.132.241.142/tcp/6744/p2p/12D3KooWR5pRvXETGRtM3JoJzqogxr4iPe4FURfSu1vhtEbv8RcA"]}
Important Terms:
- CID: This is a Content Identifier.
A content identifier, or CID, is a label used to point to material in IPFS. It doesn't indicate where the content is stored, but it forms a kind of address based on the content itself. CIDs are short, regardless of the size of their underlying content. - docs.ipfs.tech/concepts/content-addressing
Retrieval URL: This is how you access your file, using the internet, through a link. docs.ipfs.tech/how-to/address-ipfs-on-web/#..
Providers: These are the same as storage providers. The ensure the storage and replication of your data. SPs associated with my file are listed above.
Storage providers in the Filecoin network are in charge of storing, providing content and creating consensus. -lotus.filecoin.io/storage-providers/get-sta..
Verify your file was Uploaded ✅
Run this command to access the /content/list endpoint:
curl -X GET -H "Authorization: Bearer Your_API_Key" http://localhost:3004/content/list
You should see an output similar to this:
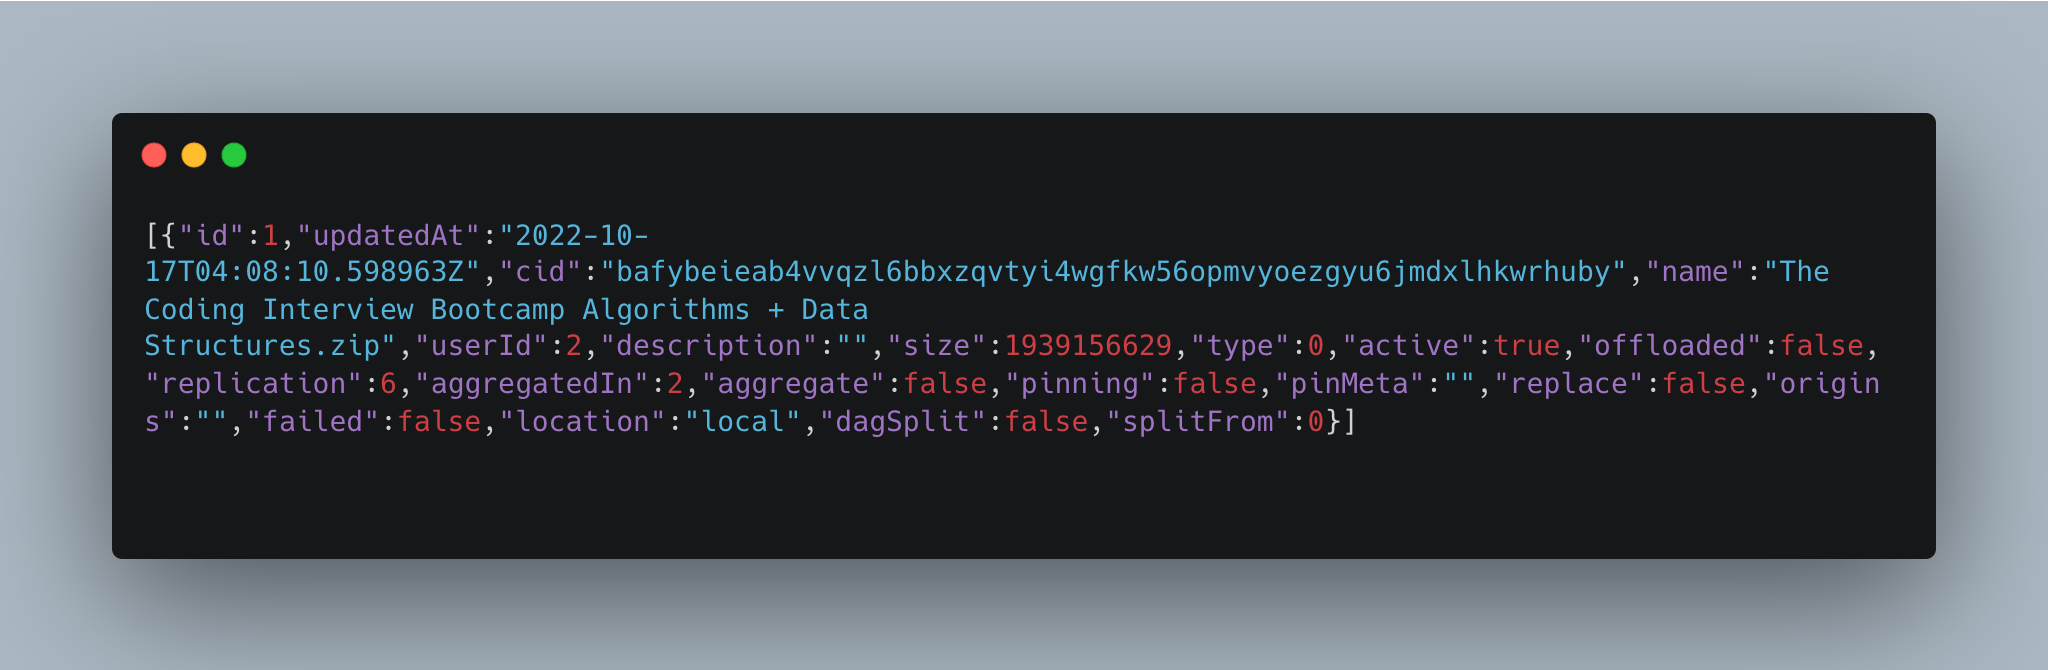
Replication is created by Storage Providers or Miners. They are the ones whole ensure a Filecoin deal is sealed. So, I have a deal sealed by 6 storage providers in the image above.
6 storage deals = 6 different storage providers
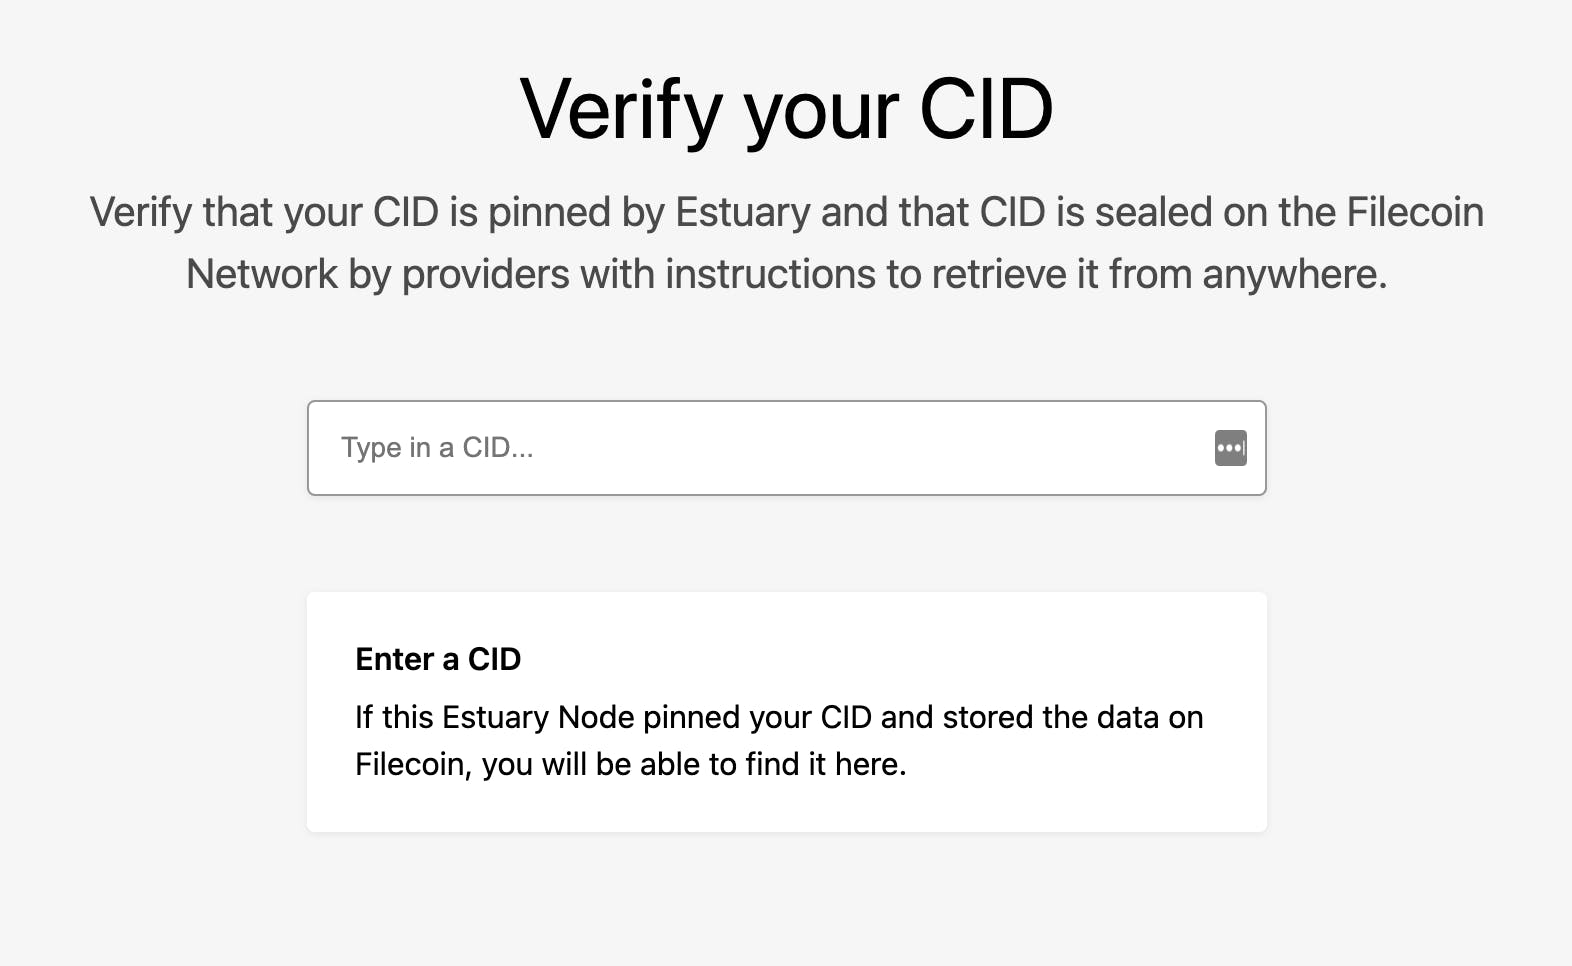
Another verification method is Estuary.tech, paste your outputted CID here: estuary.tech/verify-cid. You will see a page that looks like the image below.
Congratulations!!!
You've uploaded a file to Estuary and learned a ton along the way. Time to Celebrate!

Rabbit Hole
To learn more about Estuary check out these resources: